
Accurate pinworm results start long before your sample reaches our lab – it all begins with proper collection.
A clean, fresh sample taken the right way is essential for reliable results.
An incorrectly collected or contaminated sample can lead to false results, meaning you might miss an active pinworm infection or treat unnecessarily.
With this simple guide, you’ll learn how to collect the perfect pinworm sample – easily, correctly, and every time..
The “Golden Rules” for a Perfect Sample
Before you even put on your gloves, there are three rules that make the difference between a testable sample and a useless one.
- Freshness is Everything. This is the most important rule. Pinworm eggs are fragile and begin to deteriorate soon after being laid. You must collect the sample as soon as possible after it’s deposited – ideally in the morning as pinworms tend to lay their eggs at night. A sample taken too late, or one exposed to heat or sunlight, can lead to false negatives – showing no eggs even when pinworms are present. The best sample is one collected first thing in the morning, before your horse has exercised or rubbed its tail.
- Avoid Contamination. Make sure the sticky tape only touches the skin around the anus and not manure, bedding, or dirt.
Any contamination can interfere with accurate testing and may prevent egg detection under the microscope. AFTER COLLECTING, DO NOT STICK YOUR TAPE TO ANYTHING OTHER THAN THE BACKING TAPE PROVIDED. - Keep it Cool (But Don’t Freeze it). Never, ever leave your sample in a hot car or on a sunny windowsill. Heat is the #1 enemy of a good sample. Store it in a cool, dark place (a fridge is perfect) until you’re ready to post it. Do not freeze the sample, as this will damage the eggs and make identification impossible.
What You’ll Need
- Your Paragon Scientific Test Kit (which includes sample tape, a sample bag, and disposable glove)
- A pen to complete your Information Sheet (also included in your Kit)
- Return packaging (you guessed it, also in your Test Kit)
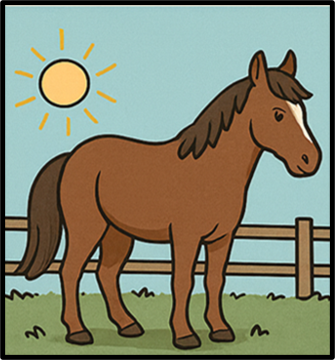
- Your Equine or Rabbit (…not included in your Kit)
5 Step Guide to Perfect Collection
Step 1: Collect in the Morning
Pinworm samples are best collected in the morning. For horses this should be before the horse has been exercised or had a chance to rub its tail.
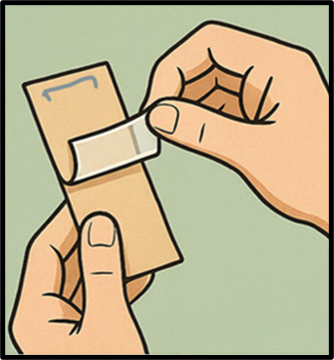
Step 2: Prepare the Tape
Remove the backing paper of the tape provided, but do not tear it from the staple.
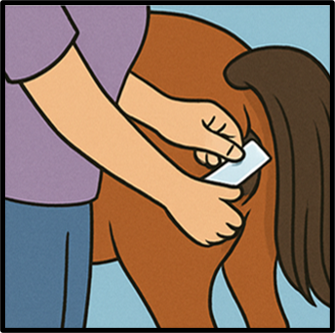
Step 3: Collect the Sample
Gently lift the tail and press the sticky side of the tape to the skin on and around the anus.
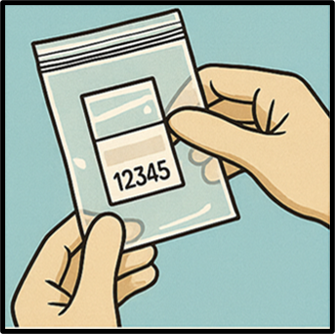
Step 4: Seal the Sample
Carefully stick the backing paper back onto the tape and place the tape into the sample bag provided.
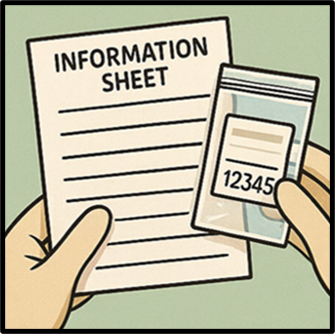
Step 5: Record the Details
Fill out the Information Sheet completely and accurately. Ensure the number on the sample bag matches the details on the sheet – this allows your sample to be correctly identified at the lab.
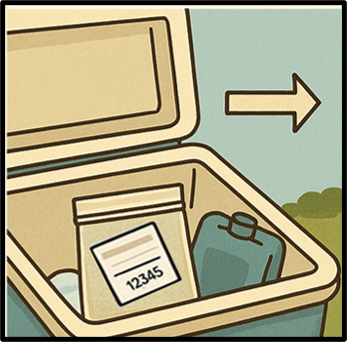
Step 6: Pack and Post
Once collected and ready for returning, place the sample, Information Sheet and provided ice brick into the return packaging. You can either return your kit yourself or contact us to arrange courier collection (depending on your selection made at checkout).
For the most accurate results we advise that you post the sample back to our lab on the same day you collected it.
If you plan to return your kit the day after collecting your sample, keep it in the fridge overnight. Do not freeze it or leave it in the sun.
Return your sample on Mondays – Wednesdays and keep in mind potential delivery delays on weekends and public holidays.
You’re Ready to Test!
Now that you’re a pro at sample collection, you’re ready to get the data you need to build a smart deworming plan. Testing, not guessing, is the cornerstone of responsible animal ownership and helps fight the growing problem of dewormer resistance.